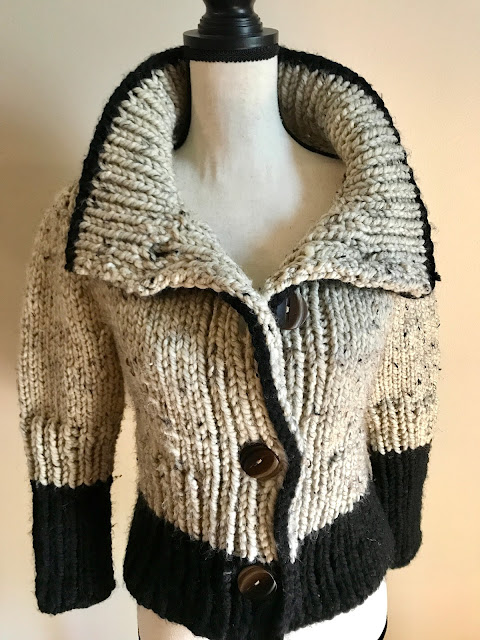
Project #33. Janet Contiguous Jacket

“The Contiguous method is a way of
knitting the shoulder seams and sleeve caps of a garment from the top down…for
a set-in sleeve look.” – Susie Myers.
Instructions for this jacket are
notes from me adapting the Contiguous Method by Susie Myers to make this
specific jacket, that I think may be helpful to you 😊. This is not a full pattern. It does not cover the collar, the front
neckline, body shaping, & the finishings.
It starts with how I calculated the
number of stitches to cast on based on my measurement and my gauge, how many
stitches I increased for the shoulder seam, and my sleeve cap & underarm
shaping before the underarm cast on.
Difficulty
Level: Intermediate.
Sample size:
XS/S.
Yarn: Lion Brand Yarns
Wool Ease.
Needle: 40” Circular
Needle in size US 8 or 5.00 mm.
Gauge (in Garter St):
8.75 sts x 19 rows = 2” x 2”.
INSTRUCTIONS
Shoulder Seam:
Start by measuring the shoulder to shoulder width (A in Figure 1).
That distance for me is 12”. My back neck opening will be half of this
distance, or 6”.
Using the gauge, the number of sts this distance
calculates to is: 6” * (8.75sts/2”) = 26.25 or 26 sts. This is the number of sts to cast on for my
back neck opening.
To also cast on for the front straps & shoulders,
add another 6 sts for a total of 32 sts.
Using the 40” CN, CO 32 sts.
I calculate how many sts to increase for the shoulder
seam from the width of my front straps, which is: 12” – 6” (neck opening) = 6”
/ 2 straps = 3” per strap, and that can be converted to 13.125 sts, or 14
sts, because I prefer even numbers.
Row 1 (R1): knit front & back (kfb), place marker
(pm), k2, pm, kfb, knit until 4 sts left, kfb, pm, k2, pm, kfb.
R2: * knit to 1 st before marker, kfb, slip marker
(sm), k2, sm, kfb*, repeat * to *, knit to end.
Keep repeating the last row to make the shoulder seam. I will repeat the last row for an additional 13
times, so that each strap will be 16 or 14+2 sts. This is because later on I am going to adjust
the markers so there will be 6 sts between markers, not two, so that the
shoulder cap lies more flat. After
adjusting the markers, it will be back to 14 sts for the straps.
Note: Instructions do not cover the front neckline. Usually I start neckline shaping near the shoulder cap or end of shoulder slope, followed by cast on for the neck frontline.
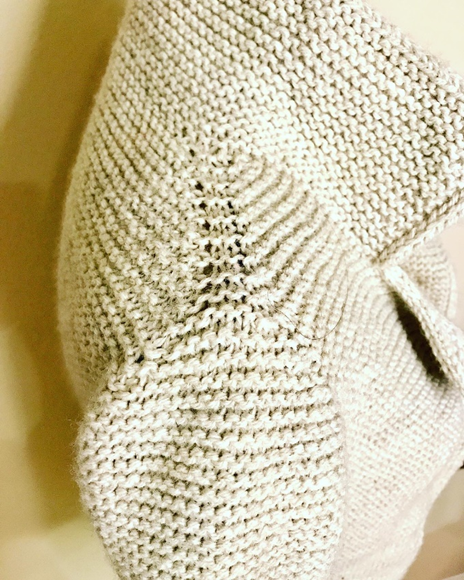
Sleeve
Cap Shaping:
Adjust markers so there will be 6 sts between
them. If you continue without adjustment
then the shoulder cap will be more pointed, and the straps a bit wider.
I approximate my sleeve cap shape according to Figure
2, where sections a-c, each with equal number of rows, are calculated using my arm
circumference (15”, B in Figure 1) – sleeve cap (~1”, A in Figure 2) – underarm
(UA) shaping (~2” total on both sides, 2*B in Figure 2) – UA cast on (~2”, C in Figure 2) = 10”.
10” /2 sides = 5” for each side of sleeve cap, and
5”/3 sections = 1.67” each for sections a, b, & c, with section a is where ~2/3 of the increases are made, section b is where ~1/3 of the increases
are made, & no increases will be made in section c.
To work out how many stitch increases to work over how
many rows, first use row gauge to convert 1.67” to 15.865 rows, or rounded to 14
rows for my example.
Next use arm circumference (10”, C on Figure 1) and stitch gauge to
calculate how many stitches need to be increased: 10” – 2” (UA cast on) = 8” *
(8.75 sts/2”) = 35 sts. Because current adjusted
number of sleeve stitches is 6, 35-6 = 29 sts, or rounded to 30 sts. Since 2 sts are increased each row, 30/2 = 15
increasing rows will be worked.
My increasing row is worked as thus:
*Knit to marker, sm, k1, kfb, knit to 2 sts before
marker, kfb, k1, sm*, repeat * to *, knit to end.
Consequently, I divided the sections a-c to 14 rows each. Increasing row was worked 10 times on rows 1, 2, 3, 5, 6, 7, 9, 10, 11, & 13 for section a, worked 5 times on rows 1, 4, 7, 10, & 13 for section b, & no increases were made for section c.
After all the sleeve cap shaping is done, creating a
bit of slope along both sides of the UA cast on will make the garment fit
better. This is done on the body side of
the garment. The number of sleeve
stitches will remain the same:
*Knit to 2 sts before marker, kfb, k1, sm, knit to
marker, sm, k1 kfb*, repeat * to *, knit to end.
I worked the UA shaping row every other row for a total of 2 times, to create a slope of ~1”, before my UA cast on.
After the UA cast on, I increased a number of stitches
to my chest measurement, and knitted the rest of the garment to my measurements
as well, with no ease.
I-cord side edgings were worked contiguously. Garment is finished with I-cord bind
off. With the front flaps, extra
stitches were provisionally cast on, then finished with I-cord bind off. This is because my I-cord cast on always
differ from the bind-off in appearance, but you can certainly try the I-cord
cast on if you want to recreate this garment.
When switching between stitches from Garter to Stockinette, or vice
versa, I also corrected for the gauge difference.
If you use these instructions to design a garment or
write a pattern, it would be nice to acknowledge me and also Susie Myers 😊.
For future
design projects, you can find me on Instagram or Ravelry as wendylinkdesigns. Please use the hashtags #contiguous
& #wendylinkdesigns on IG & the same tags on Ravelry so I can
see how well this method works out for you.