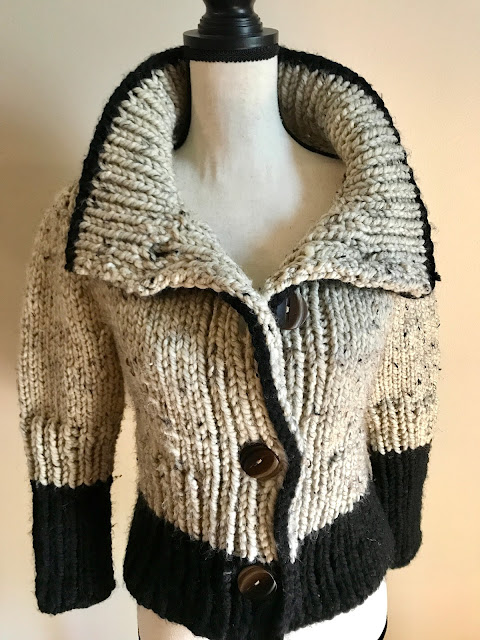
Project #37 Melanie
Pdf download in my Kofi shop!
Suggested donation is $6 or two ☕ Kofi's.

Melanie is knitted bottom-up & in-the-round to underarms. Then the front & back body are knitted
flat separately. The shoulder straps are
later combined to form contiguous shoulder seams. Finally, garment is finished with garter
stitch neckband knit in the round.
Sample garment in size Small is very fitted with ~2” or
~5.1 cm of negative ease from body measurements, cropped, & falls to low waist. Note that the designer is pear body-shaped,
& petite (5’4” or 163 cm).
The garment ease for each of the sizes are ~2” (0’,
2”, 0”, 2”) or ~5.1 (0, 5.1, 0, 5.1) cm for S (M, L, XL, 2XL). For sizes M & XL, garment will fit looser
but still be fitted because of waist-shaping.
Difficulty Level:
Intermediate/Advanced.
Sizes: Small (32”
B, 26” W) or (81.3 cm B, 66 cm W), Medium (34” B, 28” W) or
(86.4 cm B, 71.1 cm W), Large (36” B, 30” W) or (91.4
cm B, 76.2 cm W), X Large (38” B, 32” W) or (96.5
cm B, 81.3 cm W), 2X Large (40” B, 34” W) or (101.6
cm B, 86.4 cm W).
Sample garment (S) weighs 230 g with yarns untrimmed
& including the gauge swatch, which is equivalent to 391 m of the
recommended yarn, listed in the Materials section below.
The suggested skeins of yarn for the whole project are
3 (4, 4, 5, 5). When in doubt, always
get an extra skein.
Materials, Tools, & Notions:
-Yarns: Lion Brand Yarns 24/7 Cotton in Ecru
#098C 100% Mercerized Cotton Medium Weight #4– 3.5oz/100g & 186 yd/170 m
-Needles: 1) 29” or
73.7 cm & 16” or 40.6 cm circular needle (CN) in US 6 or 4.00 mm.
2) Crochet
hook in US6 or 4.00 mm (optional).
-All else: Stitch markers, 4 split ring markers, waste yarn or stitch holders, tape measure, yarn needle & scissor.
Gauge:
-Blocked gauge in St
st (knit in-the-round): 11 sts x 15.5 rounds = (2 x 2)”
or (5.1 x 5.1) cm.
INSTRUCTIONS
Body
CO 168 (192, 192, 216, 216)
sts using the US 6 (4.00 mm) 29” CN.
Join round, place BOR marker, & making sure not to
twist, start following Figure 1 on pg 8 starting from round 5 (5, 5,
1, 1) & refer back to the pattern for instructions on specific
rows. Work first 12 stitches, then work
the 24 stitches repeat in the red box until 12 stitches left. Work remaining 12 stitches. It is recommended that you use pattern
repetition markers.
For round 3 (R3) for sizes XL & 2XL &
for R7 for sizes S, M, & L, start with a yo.
For clarity & as an example, R3 & R7
are written out as follows:
First
12 sts: (yo, k1) x3, yo, k2tog x4, k1
Repeating
24 sts: k2tog x4, (yo, k1) x7, yo, k2tog x4, k1
Last
12 sts: k2tog x4, (yo, k1) x4
After R11 is worked, there should be 154 (176,
176, 198, 198) stitches.
After R15 is worked, there should be 140 (160,
160, 180, 180) stitches.
After completion of Figure 1, start following Figure 2
on pg 9. The repeat is now a multiple of
20 stitches.
On R3 of Figure 2, you can either make bobble
using a crochet hook or knitting needles:
·
A crochet hook was used to make a 5 st
bobble for the sample garment. A
tutorial on how to do this is curated on my blog. The website address of my blog is in the
Endnotes on page 7.
·
To make the bobble with knitting needles,
make a 3 row, 5 sts bobble:
1) Increase
1 st to 5 sts by alternating between knitting the front & back loops of the
same stitch. Turn work.
2) Purl
the 5 sts just worked. Turn work.
3) Knit
the 5 sts just worked.
4) Pass
the 2nd st over your 1st st on the right needle &
repeat 3 times until the 5 sts are decreased back to 1.
For R7 of Figure 2,
you also have the option to work the double decrease as a central double
decrease like some of my testers (pictures on Ravelry pattern page).
Knit to 1 st left on R10 of Figure 2,
move the BOR marker 1 stitch to the right & start with a yo on R11. The purpose of doing this is so that the BOR
marker won’t be caught in the double decrease on R11. Remember to also move your pattern repetition
markers if you are using them.
For clarity, R11 is written out as follows:
YO,
sl 1, k2tog, psso, yo, k1, yo, k6
Sl
1, k2tog, psso, k6, yo, k1.
Decreasing for Waist
On R15, one stitch will be decreased for each
pattern repetition for a total of 7 (8, 8, 9, 9) stitches decreased. (133, 152,
152, 171, 171 sts) Each pattern repetition will now be 19 sts.
For clarity, R15 is written out as:
YO,
k1, SKP, yo, SKP, k1, yo, k4,
Sl
1, k2tog, psso, k4, yo, k1, k2tog.
Increasing for Chest & Centering the
Lacework
On R39, 7 (8, 8, 9, 9) stitches will be increased
to make 140 (160, 160, 180, 180) stitches total.
For size Small, work to the end of R43. For all other sizes, work to the end of R47.
For the next row, a side marker will be placed &
BOR marker will be shifted where the markers will center the lacework for sizes
S, XL, & 2XL because of the odd number of pattern repeats.
NR: K75 (80, 80, 95, 95),
place side marker, knit to 0 (1, 1, 0, 0) stitch before BOR marker.
For sizes S, XL, & 2XL, shift the BOR marker 5 sts
to the left & knit to 1 st before this marker.
For size S
Work the Increasing round (IncR) below in half inch
increments for a total of 5 times when garment measures 0.5”, 1”,
1.5”, 2”, & 2.5” or 1.3 cm, 2.5 cm, 3.8 cm, 5.1 cm,
& 6.4 cm from the top of lace waistband. A total of 20 stitches will be increased to
make 160 stitches.
For sizes M & L
Work the Increasing round (IncR) below in half inch
increments for a total of 7 times when garment measures 0”, 0.5”,
1”, 1.5”, 2”, 2.5”, & 3” or 0 cm, 1.3 cm, 2.5 cm,
3.8 cm, 5.1 cm, 6.4 cm & 7.6 cm from the top of lace waistband. A total of 28 stitches will be increased to
make 188 stitches.
For sizes XL & XXL
Work the Increasing round (IncR) below in half inch
increments for a total of 7 times when garment measures 0”, 0.5”,
1”, 1.5”, 2”, 2.5”, & 3” or 0 cm, 1.3 cm, 2.5 cm, 3.8 cm, 5.1 cm,
6.4 cm & 7.6 cm from the top of lace waistband. A total of 28 stitches will be increased to
make 208 stitches.
For all sizes
IncR: Start from 1 st
before BOR marker, *m1R, k1, sm, k1, m1L*, knit to 1 st before side marker, rep
* to *, knit to end. (4 sts increased per round)
Continue to work in St st until garment measures ~3”
(3”, 3.25”, 3.5”, 3.75”) or ~7.6 cm (7.6 cm, 8.3 cm, 8.9 cm, 9.5 cm)
from lacework. End the last round before
reaching this length 9 stitches before BOR marker.
Underarm Garter Stitch Borders (all sizes)
NR1: Start from 9
stitches before BOR marker, p9, sm, p9, knit to 9 sts before side marker, p9,
sm, p9, knit to end.
NR2: Start from BOR marker,
knit to 9 stitches before BOR marker.
Repeat NR1 & NR2 above twice for a total of
6 rounds worked, creating 3 garter stitch ridges.
Underarm Bind Off & Shaping (all sizes)
NR: P3, & starting from
6 sts before BOR marker, BO 12 sts while removing marker, p2, knit to 9 sts
before side marker, p3, BO 12 sts while removing marker, p2, knit to end. (24 sts decreased)
There should now be 68 (82, 82, 92, 92) sts each for
both front & back of body. Put the
back onto waste yarn if this makes working the front easier for you.
*NR1 (WS): K3 (garter
st border), p2tog, purl to 5 sts left, p2tog-tbl, k3 (2 sts decreased). This will create a longer first garter
ridge on one side. This is intentional so
that the garter borders are made using knit stitches on both sides.
NR2 (RS): Knit all stitches.
Repeat NR1 & NR2 above twice for a total of 6
stitches decreased. There should now be
62 (76, 76, 86, 86) stitches.
NR3: K3, purl to 3 sts left,
k3.
NR4: Knit all stitches.*
Continue working NR3 & NR4 until garment measures
~5.5” (6”, 6.25”, 6.75”, 7”) or ~14 cm
(15.2 cm, 15.9 cm, 17.1 cm, 17.8 cm) from underarms, ending on a WS row.
Front Neckline (all sizes)
NR (RS): K14 (18, 18, 22, 22),
k34 (40, 40, 42, 42) sts & put these sts onto holder or waste yarn, k14 (18,
18, 22, 22).
Neckline shaping on the right front (RF)
shoulder strap (all sizes)
NR1 (WS): K3, purl to
3 sts left, p2tog-tbl, p1.
NR2 (RS): K all sts.
Repeat NR1 & NR2 above once. There should now be 12 (16, 16, 20, 20) sts.
Cut yarn. Neckline shaping for the LF strap will be
worked when back is joined with the front.
Back Body
Work the back in the same way as the front starting
from *NR1 to end of NR4 in Underarm BO & Shaping section,
attaching yarn from the WS of fabric.
Continue working NR3 & NR4 until garment measures ~6”
(6.5”, 6.75”, 7.25”, 7.5”) or ~15.2 cm (16.5 cm,
17.1 cm, 18.4 cm, 19.1 cm) from the underarms ending on a WS row.
Work the back neckline BO as in the front on the RS of
garment.
For the neckline shaping for left back (LB) shoulder
strap, repeat the shaping for RF strap that results in 12 (16, 16, 20, 20) sts
for the strap.
Mark the back side with a split ring marker or waste
yarn so it is easily distinguishable from the front.
Neckline shaping on the left front (LF)
shoulder strap
Cut yarn & transfer stitches of LF strap to
needle.
NR1 (WS): P1, p2tog, purl to
3 sts left, k3.
NR2 (RS): Knit all stitches.
Repeat NR1 & NR2 above once.
Left Shoulder Seam
NR3 (WS): P1, p2tog, purl
all stitches on LF strap, pm, then purl stitches on LB strap to 3 sts left,
p2tog-tbl, p1. (2 sts decreased, 22 [30, 30, 38, 38] sts total for the seam)
NR4: Knit to 2 sts before
marker, k2tog, sm, ssk, knit to end. (2 sts decreased)
NR5: Purl to 2 sts before
marker, p2tog-tbl, sm, p2tog, purl to end. (2 sts decreased)
Repeat NR4 above for a total of 4 (7,
7, 9, 9) times & NR5 above for a total of 4
(7, 7, 9, 9) times.
Put remaining 2 sts on stitch holder or waste yarn to
be worked with neckband. Leave a long
tail to secure the shoulder seam later if you wish to do so.
Right back (RB) strap & the right
shoulder seam
Work the RB strap as in LF strap, then work right
shoulder seam as the left seam.
Neckband (all sizes)
Transfer right shoulder stitches onto the 16” CN, k1,
*PU every 3 out of 4 sts on slanted edge, place split ring marker in the last
st of the slanted edge to mark the corner, knit every st along the horizontal
neckline, again PU 3 out of 4 sts on the slanted edge & place split ring marker
on the 1st st of the slanted edge*, knit the left shoulder stitches,
repeat * to *, k1, place BOR marker.
NR1: *Purl to split ring
marker, p2tog & adjust marker, purl to 1 st before next split ring marker,
p2tog & adjust marker*, repeat * to *, purl to end.
NR2: Knit all sts.
Repeat NR1 & NR2 above twice to create
three ridges total.
BO loosely.
Securing the shoulder seams (optional)
Cotton garments can be a bit heavy & to add a bit
more support to the shoulder seams, you can secure them like I did in Figure 3
on pg 10.
Endnotes: Thank you for your interest in my
design! Please look for me on:
Instagram: @wendylinkdesigns
Ravelry: @wendylink
Further support can be made at:
Abbreviations:
BO: Bind off.
BOR: Beginning of round.
CN: Circular needle.
CO: Cast on.
K2tog: Knit two together.
Kfb: Knit both front & back loops to increase 1.
LB: Left back.
LF: Left front.
M1l: Make one left.
M1r: Make one right.
NR: Next row or round.
P2tog: Purl two together.
P2tog-tbl: Purl two together through back loop.
Pfb: Purl both front & back loops to increase 1.
Pm: Place marker.
Psso: Pass slipped stitch over.
PU: Pick up.
RB: Right back.
RF: Right front.
RS: Right side.
SKP: Sl 1, k1, psso.
Sl: Slip stitch.
Sm: Slip marker.
Ssk: Slip, slip, knit.
St st: Stockinette stitch
WS: Wrong side.
YO: Yarn over.